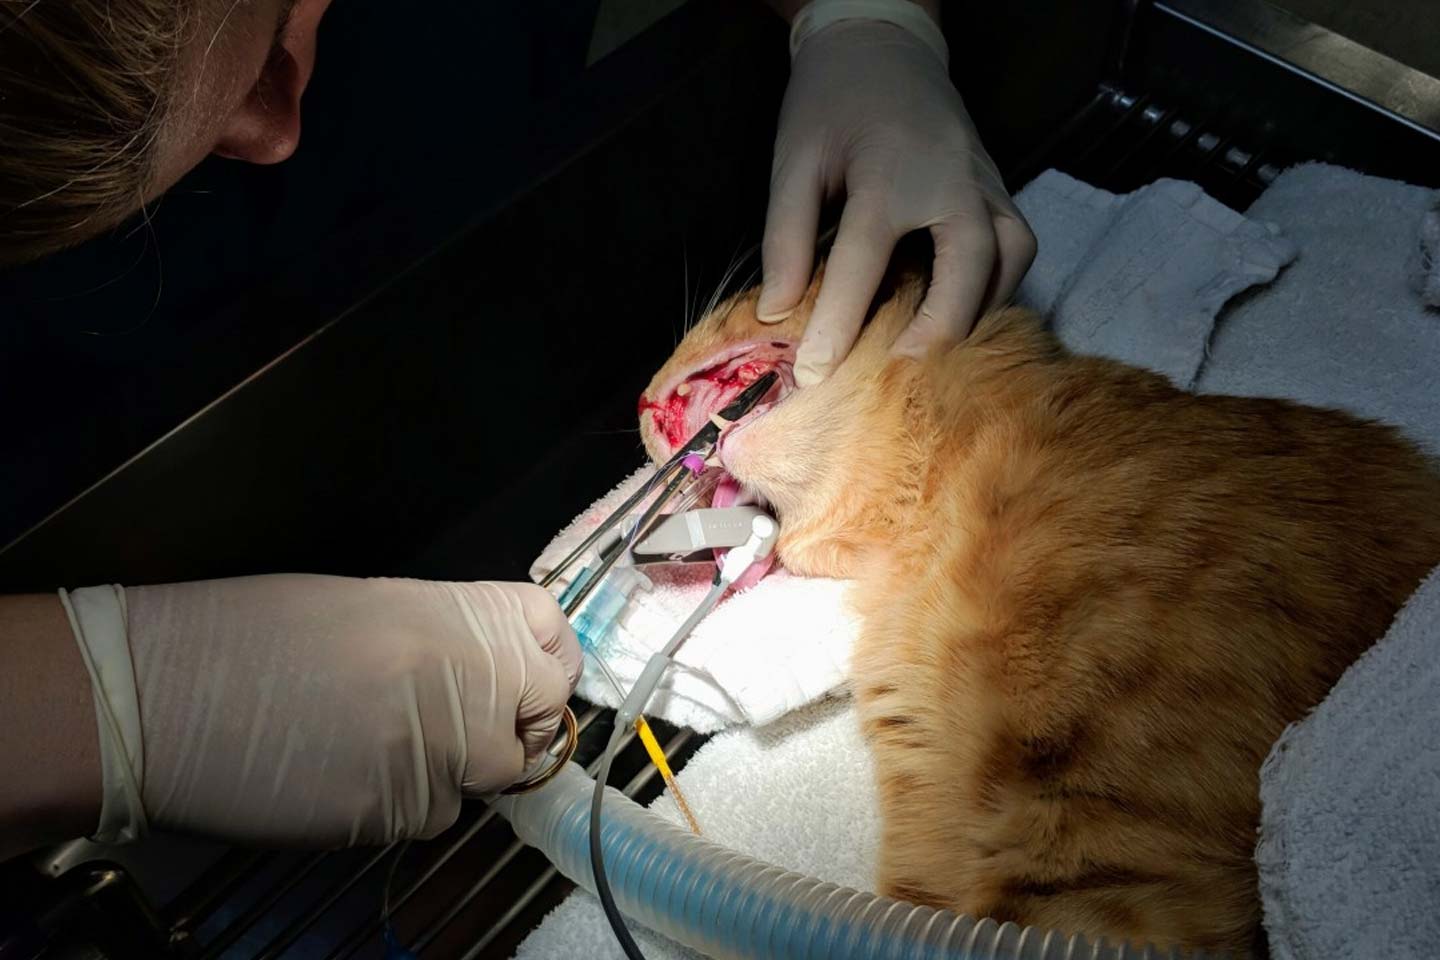
For veterinary surgeons, correct material selection and correct suturing technique plays an important role for traumatic surgical operations. Just like animals, suturing is one of the indispensable and common surgical operations in animal anatomy. Veterinary surgeons apply special suturing techniques depending on the wound condition. Surgeons must be aware of the suture needle, thread, knots, strength, usage type to correctly close the wound of the individual undergoing a surgical operation. Click here to learn more about veterinary suture types, materials and properties before veterinary suture techniques.
1. Veterinary Suture Techniques
There are numerous suture techniques. Each suture technique depends on wound shape and depth. The most important purpose for suturing is to ensure fast recovery with minimum tissue reaction. Suture selection is highly critical for the wound or incision to heal sufficiently and on-time. The veterinary suturing suture techniques are listed below:
- 1.1 Simple Suture
- 1.2 Cross Suture
- 1.3 Horizontal Mattress Suture
- 1.4 Vertical Mattress Suture
- 1.5 Halsted Suture
- 1.6 Lembert Suture
- 1.7 Gambee Suture
- 1.8 Continuous Suture
- 1.9 Subcutaneous Suture
- 1.10 Ford Locking Suture
- 1.11 Bag Ring Suture
- 1.12 Chinese Finger Trap Suture
We have listed the most preferred suture techniques. You can click on all the techniques here to view the sutures with visuals and texts.
1.1 Simple Suture
Simple sutures are placed horizontally from right to left. The direction is the opposite for left-handed surgeons. The needle is handled by the needle holder, pressed to the opposite side of the wound 2-5 mm away from the edge of the tissue, taken above the skin and connected.
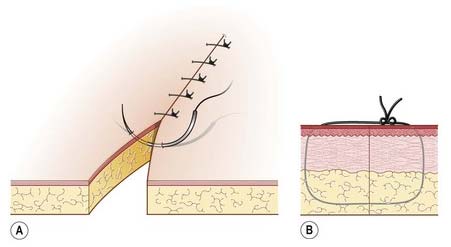
Figure 1 – Simple Suture Technique (1)
1.2 Cross Suture
This is a commonly preferred method by surgeons by creating a simple suture connected with a knot. The most important advantage is connecting the tissues tighter. Just like the simple suture, the first step is to enter subcutaneously to the opposite side of the wound from 2-5 mm away from the tissue. Then, the needle transits to the opposite side from the exit point and the first step is repeated and the suture is completed with a knot.
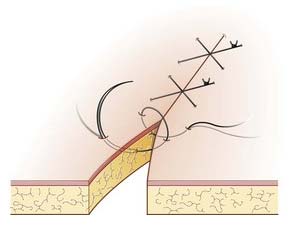
Figure 2 – Cross Suture Technique (1)
1.3 Horizontal Mattress Suture
In this method, the needle is subcutaneously pricked from 2-5 mm away from the tissue edge and taken out from the opposite site horizontally and a knot is formed. The pressure is applied to a larger area and tissue rupturing risk is minimised.
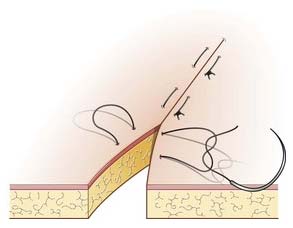
Figure 3 – Horizontal Mattress Suture Technique(1)
1.4 Vertical Mattress Suture
By using the needle holder, the needle is subcutaneously pricked 8-100 mm away on the opposite side and a knot is formed. This technique has stronger tension than horizontal mattress suture.
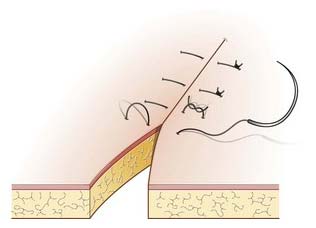
Figure 4 – Vertical Mattress Suture Technique (1)
1.5 Halsted Suture
This technique is similar to vertical suturing. But before making a knot, the suture is implanted parallelly to the incision region. Halsted suture looks like a dashed pattern because the wound edges are reversed.
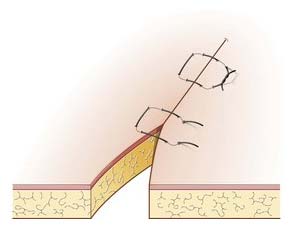
Figure 5 – Halsted Suture Technique (1)
1.6 Lembert Suture
This technique is similar to mattress suture and preferred for repairing caveated organs. Since the adherence layer is submucosa, the suture must be adjusted not to enter the lumen and the suture must not be tightened too much. If the suture is tightened too much before the knot, the wounded tissue might turned upside down.
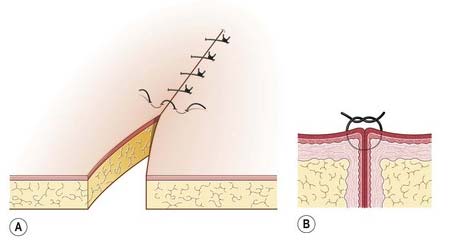
Figure 6 – Lembert Suture Technique (1)
1.7 Gambee Suture
This technique is often preferred in intestine repairs. The purpose to use this suture is to decrease mucosa eversion and serosa surface rupture of the intestine.
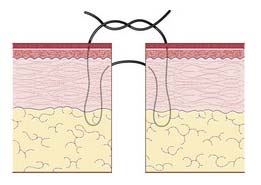
Figure 7 – Gambee Suture Technique (1)
1.8 Continuous Suture
If the incision is long, continuous suture technique is used. In this technique, instead of losing time with knotting after every suture, a long incision area is sutured in a short time. At the same time, the tensile strength on the suture can be more equally distributed around the tissue. One of the disadvantages of continuous suture technique is that if one of the cycles is lose or ruptures, the thread will disintegrate.
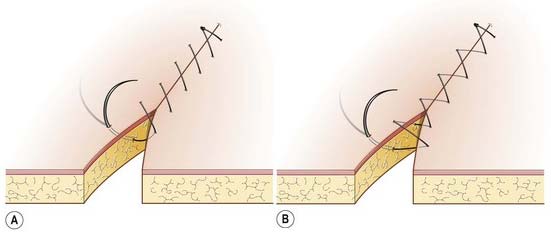
Figure 8 – Continuous Suture Technique (1)
1.9 Subcutaneous Suture
This suture is applied subcutaneously in simple and continuous pattern. The needle can enter horizontally or vertically. This technique is also called embedded suture due to application type. This technique is used for avoiding any suture marks on the tissue and to reduce scarring.
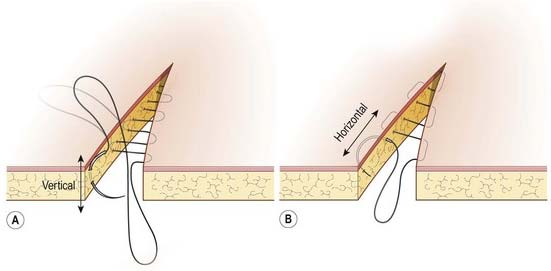
Figure 9 – Subcutaneous Suture Technique (1)
1.10 Ford Locking Suture
This type of suture which is applied with locking style required more suturing materials than other suture techniques. Locking technique makes the suture stronger against patient’s intervention or external interventions. This technique is preferred to prevent a suture material subjected to external intervention to damage the internal tissues.
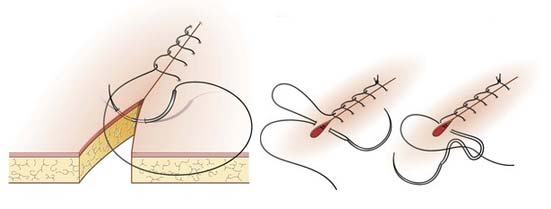
Figure 10 – Ford Locking Suture Technique (1)
1.11 Bag Ring Suture
This technique is preferred to fix visceral logs, and percutaneous tubes to a vicus in gastronomic and cystostomy procedures.
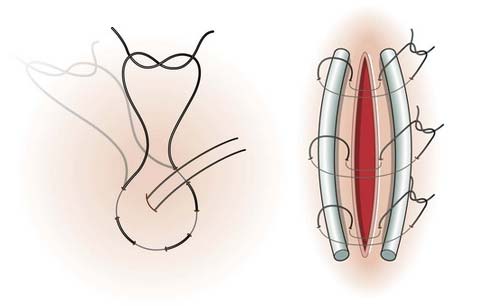
Figure 11 – Bag Ring Suture Technique (1)
1.12 Chinese Finger Trap Suture
This is a technique consisting of a series of knots to fix a tube in subcutaneous sucking and discharge. If the tension on the tube increases when the tube is taken out, this suture prevents the tube to be taken out.
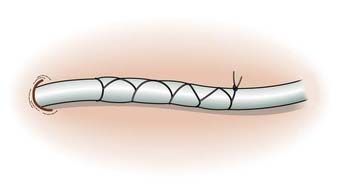
Figure 12 – Chinese Finger Trap Suture Technique (2)
2. Veterinary Suture Knot Techniques
Knotting is as important as suturing. Suture must be connected with a correct knot to avoid the suture to get lose, move, or damage the tissue. The veterinary suture knot techniques are listed below:
- 2.1 Square Knot
- 2.2 Sliding Knot
- 2.3 Rounded Knot
- 2.4 Surgical Knot
- 2.5 Subcutaneous Knot
We have listed the most preferred knot techniques. You can click on all the techniques here to view the sutures with visuals and texts.
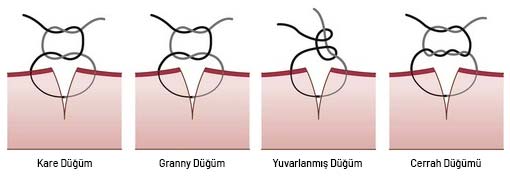
Figure 13 – Suture Knot Techniques – Square Knot, Sliding Knot, Rounded Knot, Surgical Knot (3)
2.1 Square Knot
This technique is the most common knot type and used for fixing most of the suture patterns.
2.2 Sliding Knot
Other than lower tension, this knot is similar to the square knot. The thread is hold facing upwards and suture is completed with sliding knot for tightening or loosening.
2.3 Rounded Knot
Rounded knot is a commonly preferred knotting technique. This knotting technique is fast and durable.
2.4 Surgical Knot
This technique created minimum tissue trauma. Surgical knot is asymmetrical. Therefore, a square knot is applied to the top for security.
2.5 Subcutaneous Knot
Subcutaneous or embedded knots are preferred to decrease the irritation that might be caused by the knots rubbing to the external tissue.
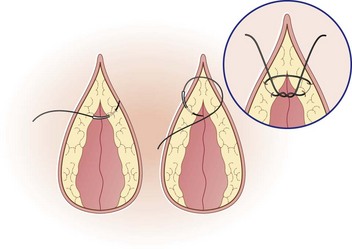
Figure 14 – Subcutaneous Knot Technique (3)
Bibliography
(1) Reproduced with permission from Stephen Baines, Vicky Lipscomb and Tim Hutchinson: BSAVA Canine and Feline Surgical Principles, 2012, originally illustrated by Samantha J Elmhurst.
(2) With permission from Baines S, Lipscomb V and Hutchinson T. (2012) Manual of Canine and Feline Surgical Principles, BSAVA Gloucester, p 289.
(3) veteriankey.com Suturing Techniques and Common Surgical Procedures, bağlantı


